

The eyes are one of the most important elements in any character or portrait illustration. In this tutorial, we will show you how to quickly draw realistic eyes in Photoshop using digital painting techniques. Let’s get started!
Step 1
Start with a 50% grey background and a sketch that will define the general shape of your eye. First, draw a shape of eyeball (it doesn’t really need to be perfect circle), and the iris looking in your chosen direction. Then draw the edges of the eyelids, according to the green lines. When you’re done, sketch whole eyelids – they should cover the eyeball.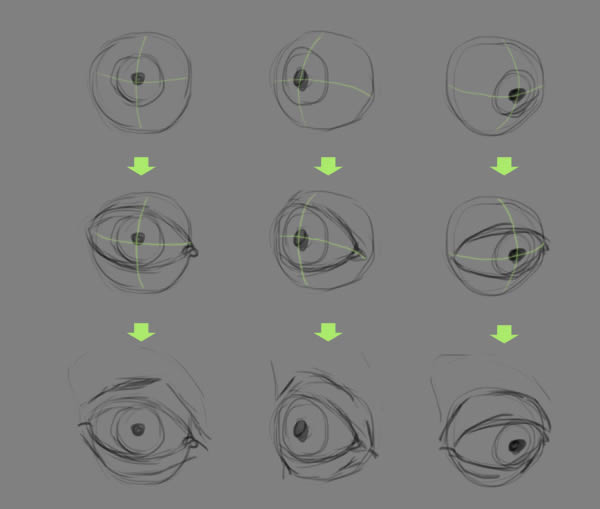
Step 2
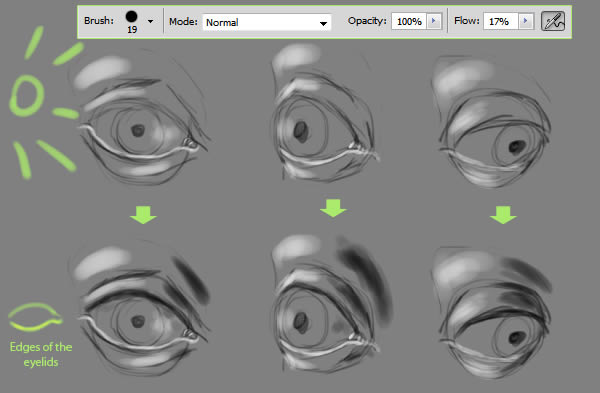
Now you need to define the light source. Let’s say it’s on the right. Choose a hard brush with 17% Flow and Airbrushing mode on, then paint some lights with white and shadows with blackTip: click "D" to set your colors to default black & white, then click "X" to switch between them). Don’t forget to stress the edges of eyelids with thick lines – without those they would seem flat.
Step 3
Draw the rim of the iris with black – start with thick circle and then sketch some lines heading to the pupil. Don’t make them too long though, you’ll need this space later. When it’s done, choose some lighter shade and draw a rim close to the pupil, but not touching it (it should make the middle ring). Sketch it like a circle with ragged edges.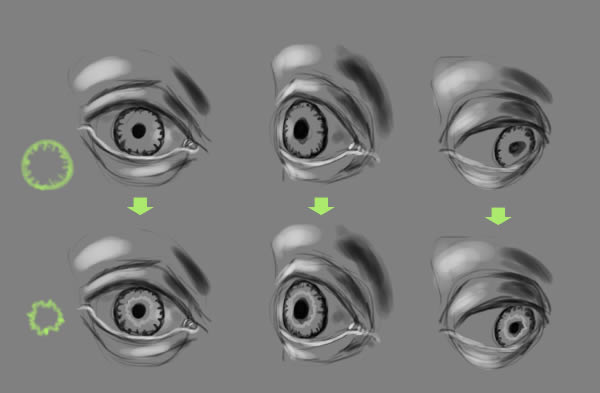
Step 4
Before you fill the iris with lines heading to the pupil, you need to learn something about structure of the iris. It looks like a crater – it’s convex from the rim to the middle, then there’s a funnel with pupil at the bottom. Use this image to place your lights and shades correctly.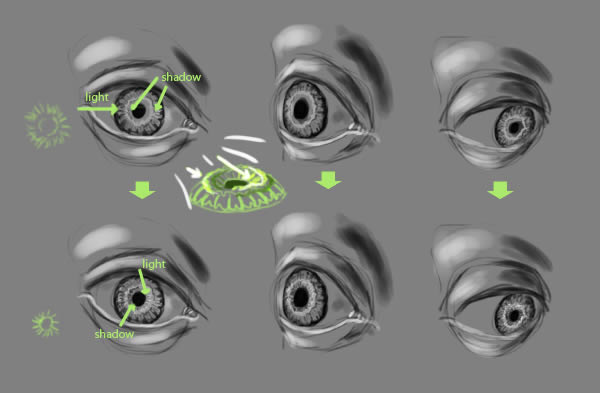
Step 5
Now you can smoothen your painting, but don’t use Smudge Tool for this – it’s too hard to control. Choose a soft brush (or lower the hardness of your current one to 0%), then pick a shade between the colors you’ve painted, and paint this area with the picked shade. It may sound complicated, but just try it – it gives much better effect than Smudge tool. Use this brush to lighten the rest of the eyeball (click in the middle of grey area just once, so that white doesn’t touch the edges). Another nice trick: when stressing the bending of the upper eyelid with black, paint some soft shade going up in the bright part, and down in the dark part.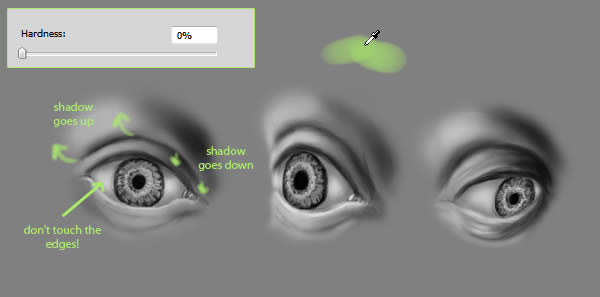
Step 6
Now put some shadow under the upper eyelid, covering part if the eyeball. Use a soft brush to blend the rim of the iris and the pupil too. They’re built into the eyeball, in the end.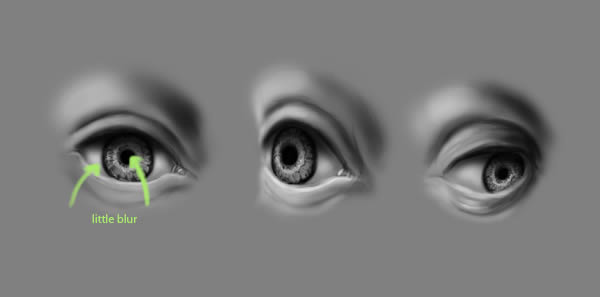
Step 7
Select a hard brush and change its mode to Linear Light, then choose white. Use it to add some shininess to your eye, just be careful – you can easily overdo it. Paint some spots wherever the eye should look wet, and – it’s another trick – draw a shadow of the eyelashes with it. Yes, white shadow. The effect will be astounding, just remember about proper waving.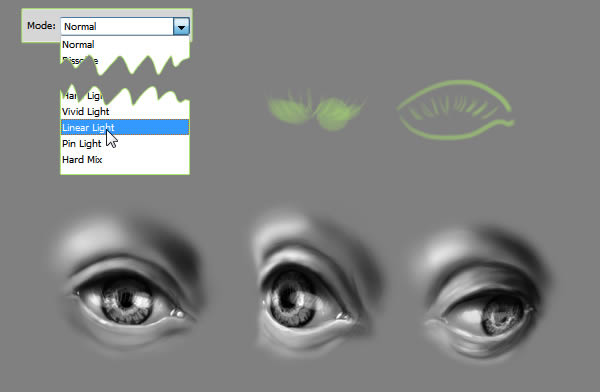
Step 8
It’s time for eyelashes. Important thing is they don’t start on the part of the eyelid that touches the eyeball (that’s a common mistake). Remember the edges you’ve drawn in step 2? This is where the eyelashes grow from – from this brink of the edge that doesn’t touch the eyeball. Another thing you need to remember of is eyelashes are bent. To stress it easily, just draw some short lines going down, then add the bent part (draw the eyelashes in tufts, not individually – it’s more natural).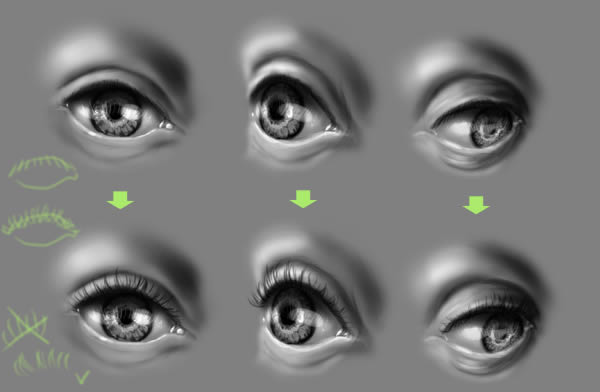
Step 9
The lower row of the eyelashes should be less dense and not so visible. They’re shorter too. Besides, notice that when light comes into the eye, it reflects on the eyelashes – use your brush with Linear Light to add some shiny lines there.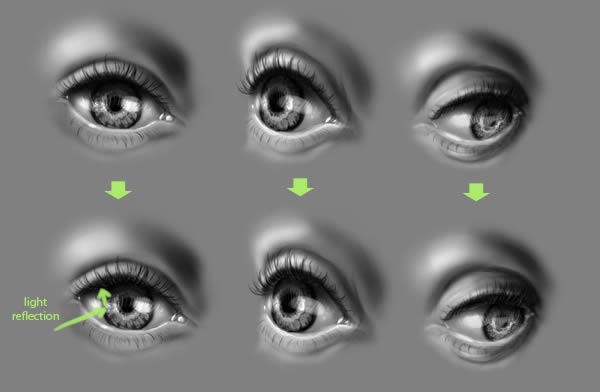
Step 10
You can stop now, but I’d like to show you some trick with coloring. Create a new layer and change it’s mode to Color. Now you can use soft brush to put colors, and the eye will still be visible (in the picture below the first row shows the colors I used, the other – the final effect).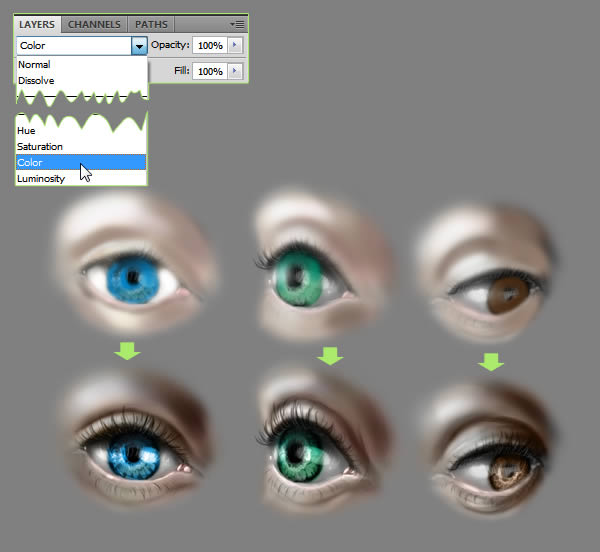
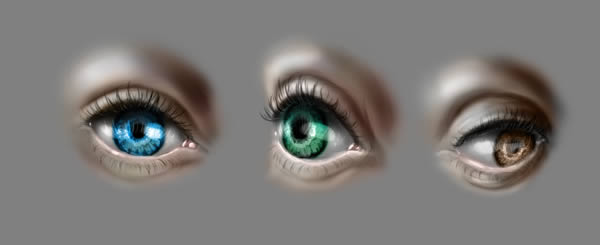
Final Image
No comments:
Post a Comment