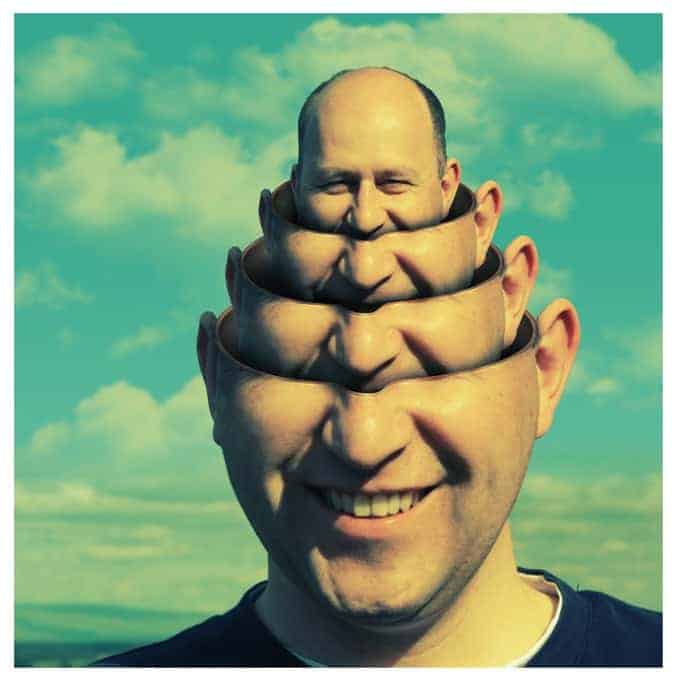
Preview of Final Results
Tutorial Resources
- Rural Self Portrait – ColinBroug
- Cloud II – avanzero
Step 1
Download and Open in Photoshop the Rural Self Portrait photo. Using Rectangular Marquee tool, create selection around the head and shoulder area like on the screenshot.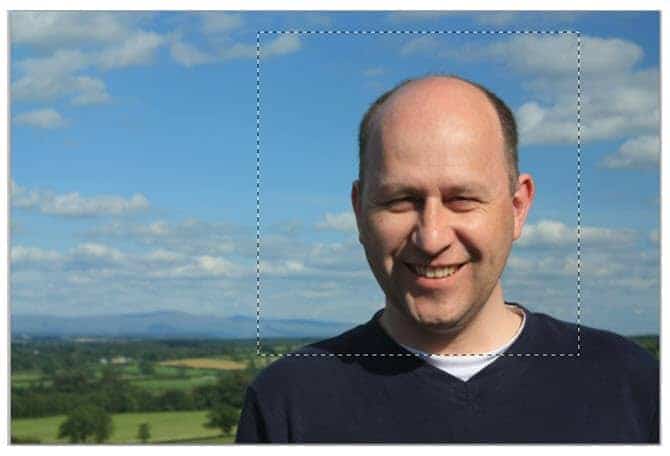
Step 2
Use Image> Crop to crop selected area, deselect with Ctrl+D. Now we get a nice close up view.
Step 3
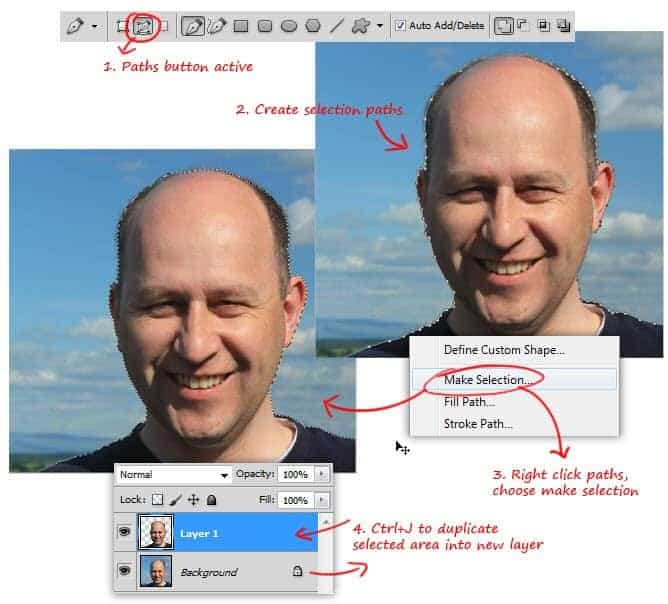
Using Pen tool, create selection path covering shoulder and head area perfectly.Right click the paths, choose Make Selection from the pop up menu. Click OK to transform path into selection.
Copy selected area to a new layer by pressing Ctrl+J.
Step 4
Draw an ellipse path using Ellipse tool, this path will mark the cut area of the head later. Edit the path’s bottom part using Direct Selection and Path Selection tool, so the path will arched following the nose shape.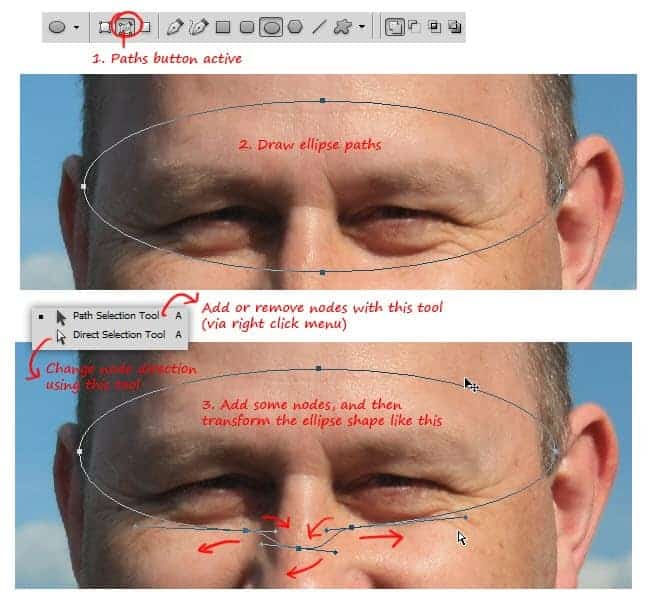
Step 5
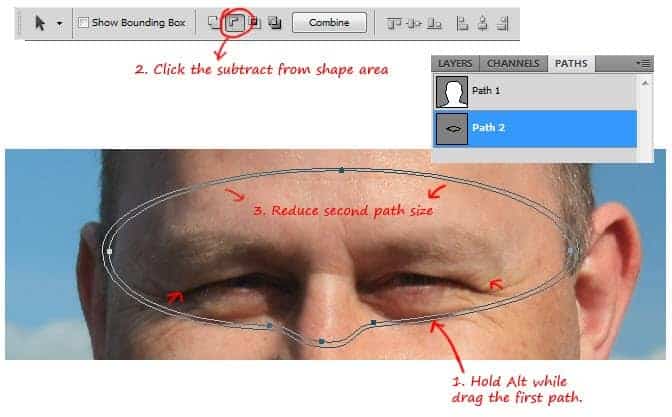
In order to create thickness for the cut area, create a second elipse path or simply duplicate the first one.Hold Alt while dragging the first path, this way the path will be duplicated when you start dragging it. With the second path still selected, click subtract from shape area button.
Go to Edit> Free Transform to reduce second path’s size and re-align its position to the center of the first path.
Step 6
Open the Paths panel (go to Window> Paths in case you didn’t know), click Load path as selection button to change the path into selection.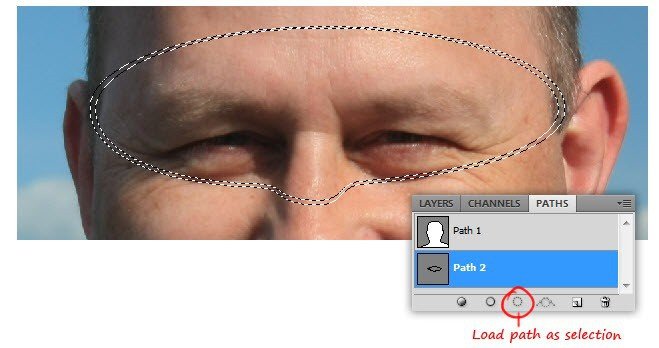
Step 7
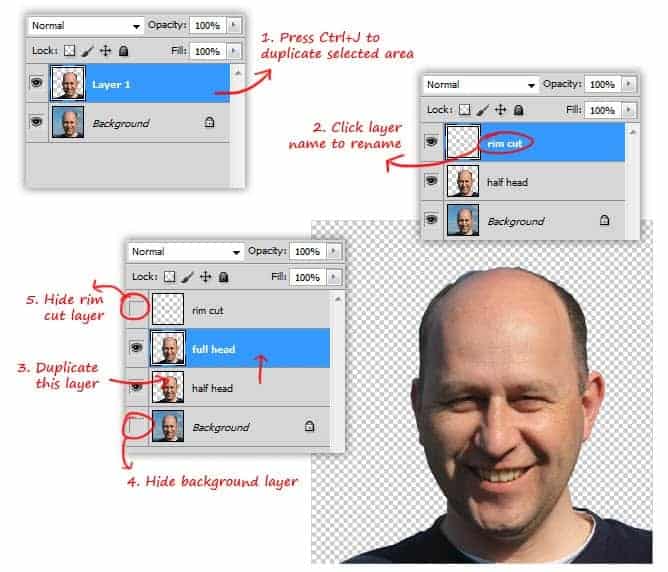
Go back to Layers panel, duplicate selected area to a new layer by pressing Ctrl+J.We also need to duplicate the half head layer. When you done duplicating layers, hide the rim cut and background layer.
Step 8
Drag full head layer to the topmost layer stack. Within the Paths panel, select rim cut path we created earlier and then Load this path as selection.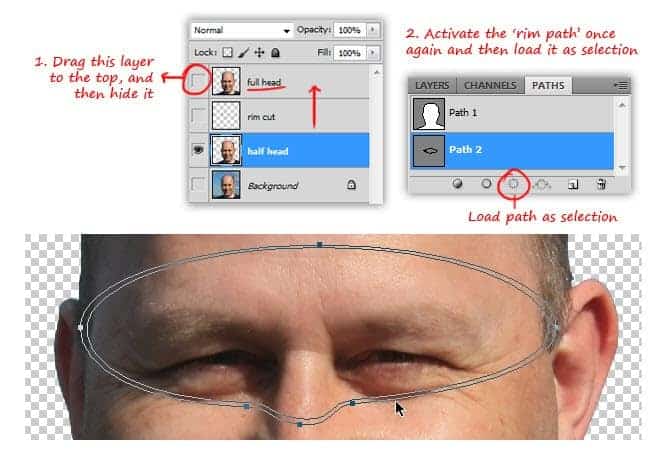
Step 9
Add layer mask for half head layer, do this while holding Alt button. This will change the selection into layer mask. And because you hold Alt button, the color of layer mask become inverted. Now we get a hole in the face.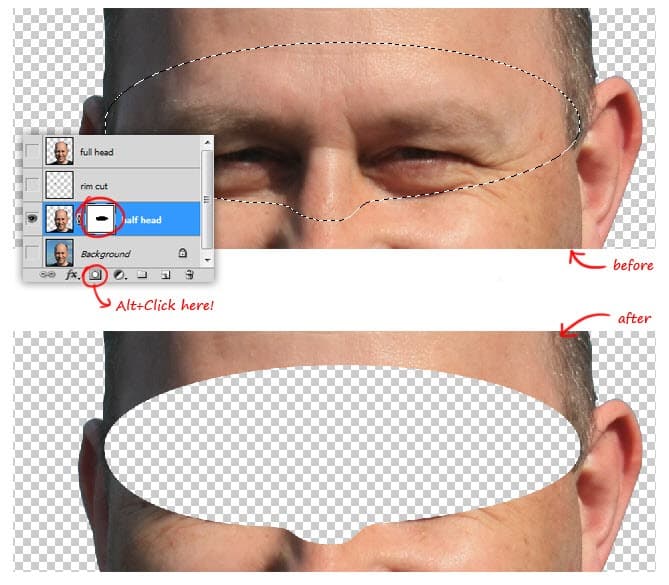
Step 10
Continue masking using hard round brush tool until the upper head part is completely hidden. Make sure you set the brush color to black when continue masking.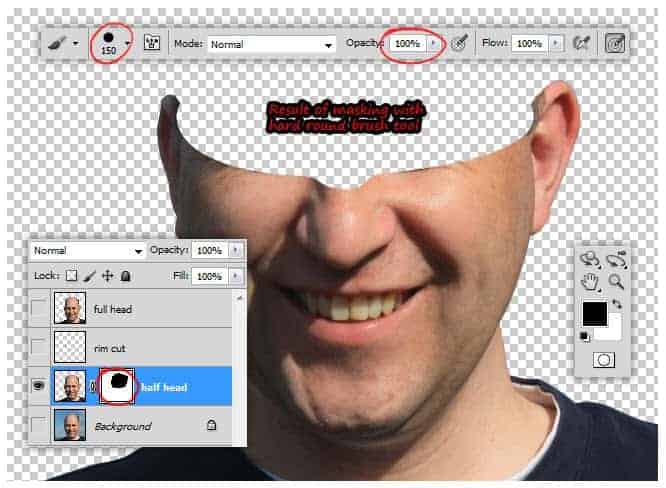


No comments:
Post a Comment